

Best Brushes for Oil Painting Detail Work: Buying Guide
The smallest brush isn’t always the most controllable. For fine lines, clean edges and small details, shape, tip and paint load matter just as much as size. Choosing the best brushes for oil painting detailed work can fe…The smallest brush isn’t always the most controllable. For fine lines, clean edges and small details, shape, tip and paint load matter just as much as size. Choosing the best brushes for oil painting detailed work can feel tricky when size labels vary and natural and synthetic fibres handle paint differently.
This guide compares useful brush shapes and fibres, then gives you a practical way to test brushes for your technique. You’ll also find straightforward tips for building a focused selection and caring for it between painting sessions.
Key Takeaways
- Choose a brush for the mark you want to make, not simply the smallest size available.
- Compare rounds, liners, flats and filberts for fine lines, edges and small forms.
- The best brushes for oil painting detailed work balance tip control, paint load and the scale of your painting.
- Build a focused selection with brushes for different tasks, rather than collecting near-identical shapes.
- Clean brushes promptly and reshape their tips carefully to help preserve the control you rely on for detail work.
What makes a brush suitable for detailed oil painting?
A detail brush is one that places the mark you need with control, whether that’s a fine line, a small shape, a clean edge or a finishing touch. Its usefulness depends on the shape and condition of its tip, how it responds to pressure, how much paint it carries and how comfortably you can guide it. There isn’t one universal choice: the best brushes for oil painting detailed work depend on your technique and the marks in your painting.
Look for a tip that holds its shape as you work and a brush that feels predictable in your hand. A pointed brush can make fine lines, while a squared edge may be easier to use for a crisp boundary or small block of colour. Spring describes how the bristles respond when pressed and return to shape. It affects how much control you feel as you move the brush. For an overview of types of paintbrushes and their uses, see the Wikipedia guide to paintbrushes.
Which details need the most brush control?
Hairlines, whiskers and fine branches call for a controlled, continuous stroke. Small forms, such as a glint in a portrait’s eye or a highlight on a piece of fruit, need enough precision to place colour without overwhelming the surrounding area. For a crisp edge, such as the rim of a glass or a sharp boundary between land and sky, a squared or firm tip may be easier to guide.
A fine mark doesn’t always require a tiny brush. A larger brush with a well-shaped point can carry more paint and lay a longer, steadier line. Match the tip to the task rather than assuming the smallest brush will handle every detail.
Why brush size alone does not determine precision
Paint load affects how far a stroke travels before it runs dry or needs reloading. Too little paint can leave a broken line; a fuller load may support a longer, more continuous stroke. The amount of paint you pick up and how thick or fluid it is both change the result.
Pressure and angle matter too. Light pressure with the tip can create a narrow line. Pressing harder or turning the brush onto its side usually makes a broader mark. Surface texture also plays a part: a textured ground can interrupt a fine stroke, while a smoother surface may let it travel more evenly. Try the brush on a spare surface using your usual oil paint consistency and hand position. This gives you a practical comparison that a size label can’t.
Round, liner or filbert? Compare brush shapes for fine oil-painting work
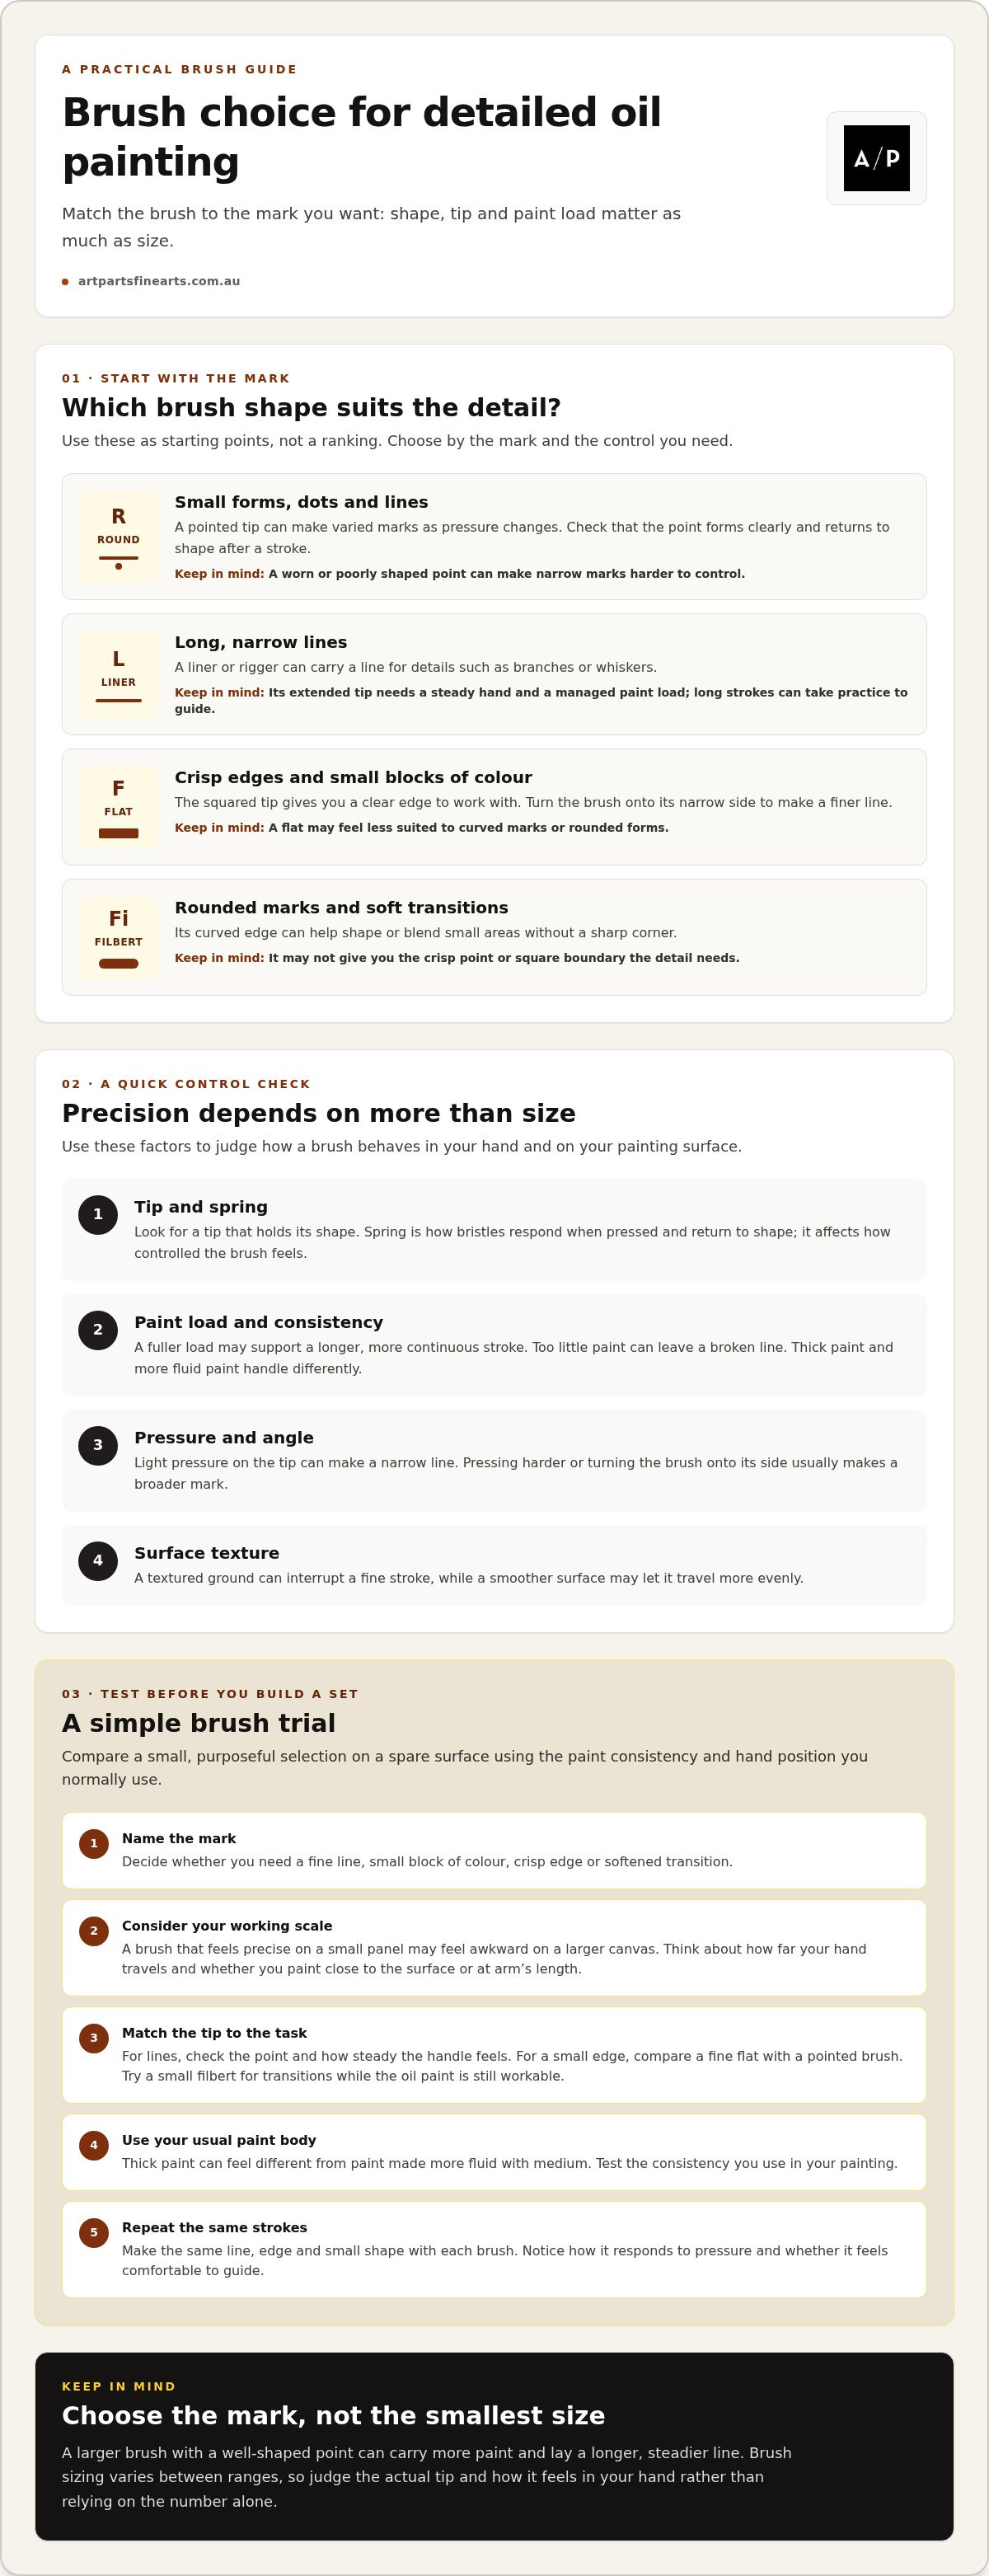
Brush shape affects the mark you can make and how easily you can repeat it. Use this comparison as a starting point, not a ranking. The best brushes for oil painting detailed work are the shapes that suit your technique and the marks in your painting.
| Shape | Useful marks | Control considerations | Likely limitation |
|---|---|---|---|
| Round | Small forms, dots and lines | A pointed tip can make varied marks as pressure changes. | A worn or poorly shaped point may make narrow marks harder to control. |
| Liner or rigger | Long, narrow lines such as branches or whiskers | Its extended shape can carry a line, but takes a steady hand and managed paint load. | Long strokes can be difficult to guide if you’re not used to the brush. |
| Flat | Crisp edges, small blocks of colour and narrow lines when turned on its edge | The squared tip gives a clear edge to work with. | It may feel less suited to curved marks or rounded forms. |
| Filbert | Rounded marks and soft transitions | Its curved edge can help blend or shape small areas without a sharp corner. | It may not produce the crisp point or square boundary you need. |
When a round brush suits small forms and controlled marks
A round is a versatile option for details that shift between a dot, a short stroke and a fine line. Try it with a little paint and check whether the tip forms a clear point and returns to shape after a stroke. Brush sizing and naming can vary between ranges, so assess the actual tip and how it feels in your hand rather than relying on the number alone.
When a liner, flat or filbert can make detail easier
Choose a liner for a long, narrow mark if you feel comfortable guiding its extended tip. A flat can make a crisp edge, or a finer line when turned onto its narrow side. A filbert suits rounded accents and gentle transitions. Paint consistency affects how readily each shape moves and releases colour, so explore the oil paint range alongside your brush choice.
Test a few strokes on the surface you plan to paint. If you regularly make detailed work on the same canvas format, full-carton canvas options can help you keep your practice surface consistent.
How to choose oil-painting brushes for your detailed technique
Start with the marks you want to make, then narrow your brush choice by shape, feel and paint handling. The best brushes for oil painting detailed work suit your actual technique, rather than a set chosen by size labels alone.
- Name the mark. Decide whether you need a fine line, a small block of colour, a crisp edge or a softened transition.
- Consider your working scale. A brush that feels precise on a small panel may be awkward on a larger canvas. Think about how far your hand needs to travel and whether you paint close to the surface or at arm’s length.
- Match the tip to the task. For lines, look for a point that stays controlled and a handle that feels steady in your grip. For a small edge, compare a fine flat with a pointed brush. Try a small filbert to soften transitions while the oil paint is still workable.
- Factor in paint body. Thick paint can feel different under the brush from paint made more fluid with medium. Test the consistency you use in your painting, rather than judging a brush with a different paint load.
- Test before building a set. Try a small, purposeful selection on a spare surface. Make the same line, edge and small shape with each brush. Note how each responds to pressure and whether it feels comfortable to guide.
Choose fibres by how they feel in use
Natural and synthetic fibres can feel different in use, but neither is automatically right for every painter. Fibre, shape and brush construction all influence how paint is picked up, moved and released. One artist may prefer the firmer feel of a synthetic brush; another may prefer the response of natural hair. Test options with your own paint and technique, and judge them by control and ease of use.
Keep your selection focused. Choose brushes that solve distinct tasks rather than several that make nearly identical marks. Browse the painting accessories range for brushes and related tools for your setup.
Build and care for a practical detail-brush setup
A useful detail-brush setup doesn’t need to be large. Start with shapes that do different jobs, then keep the ones that give you reliable marks in your own painting. Care matters too: paint left in the bristles or a tip stored out of shape can make precise work harder next time.
A focused brush selection for detailed oil painting
Think in terms of roles, not a fixed kit. A pointed brush can cover fine lines and small marks; a narrow flat can help with edges; and a small filbert can soften transitions. These are starting points, not a rule about which brushes everyone needs.
Try each shape on a spare surface, making the same line, edge and small form. Notice which brush feels easiest to guide and gives you the mark you want with your usual paint consistency. Repeating the test helps you decide which shapes earn a place in your setup and which are too similar to keep together.
Clean and store brushes to protect their working shape
After painting, wipe excess oil paint from the bristles before cleaning. Use a cleaning method suited to oil paint and the materials you work with, following the directions for your chosen cleaner. Avoid leaving paint in the brush while you move on to other tasks.
Once clean, gently reshape the bristles into their working profile. Store brushes so their tips aren’t pressed against a surface or bent under other tools. A little care after each session helps keep the point or edge ready for controlled marks.
If you’re building a regular routine of detailed studies, a consistent surface can be a useful companion to your brush setup. Explore full-carton canvas options for regular painting.
Put your detail-brush choices into practice
For fine oil-painting work, choose a brush for the mark you need, not simply the smallest size. Shape, tip control, paint load and the way a brush feels in your hand all affect the result. The best brushes for oil painting detailed work suit your technique, whether you’re laying in a fine line, sharpening an edge or softening a small transition.
Start with a few distinct brush shapes and test them with your usual paint consistency on a spare surface. Keep the ones that make your intended marks comfortably, then clean and reshape them after use to help preserve their working tips. Art Parts Fine Arts stocks brushes alongside oil paints, mediums and other painting supplies, so you can build a setup that works together.
For schools, art centres, TAFEs and high-volume artists, full-carton stretched canvas offers bulk savings and consistent quality for regular detailed work. It’s a useful companion surface, not a substitute for choosing the right brush.
Try a few purposeful marks with the brushes and oil paints in the Art Parts Fine Arts range to find a detail setup that feels right for your work.
Frequently Asked Questions
What is the best brush shape for detailed oil painting?
There’s no single shape that suits every detail. A round brush with a controlled point can make lines, dots and small forms, while a flat can help with crisp edges and narrow marks when turned on its side. A filbert is useful for rounded marks or soft transitions, and a liner can make long, narrow strokes. Choose by the mark you need, then test the brush with your usual paint consistency.
Are synthetic or natural-hair brushes better for oil painting details?
Neither fibre type is automatically better for every painter or technique. Natural and synthetic brushes can feel different in use, and the brush’s shape and construction also affect how it handles paint. Pay attention to how easily you can guide the tip, place a mark and clean the brush after painting. Compare options with the oil paint consistency you normally use, rather than choosing by fibre label alone.
Can a small brush make fine lines in oil paint?
Yes, a small brush can make fine lines, but size alone doesn’t guarantee a clean or continuous stroke. The point, paint load, pressure and angle all affect the line. A slightly larger brush with a well-shaped point may carry enough paint for a longer stroke, while a very small brush may need frequent reloading. Test different options on a spare surface to see which gives you the control and line length you want.
What size brush should I use for fine details in an oil painting?
Choose a size that suits the scale of your painting and the mark you want to make, rather than relying on a universal recommendation. Size labels can vary between brush ranges, so compare the actual width and shape of the bristles. Test a few brushes with your own paint and hand position. If the brush feels comfortable and makes the line or small shape you need, its number matters less than how it performs.
How do I keep an oil-painting brush pointed?
Wipe excess paint from the bristles after use, then clean the brush with a method suitable for oil paint and the materials you use. Gently reshape the bristles into a point while they’re clean. Store the brush so the tip isn’t pressed against a surface, crushed or bent beneath other tools. Regular care helps preserve the working shape, though a brush may not return to a point if its bristles have become worn or damaged.
Do I need a liner brush for detailed oil painting?
No, a liner isn’t essential for every painter. Its long, narrow shape can help with continuous marks such as fine branches, whiskers or narrow accents, but it takes practice to guide the stroke and manage the paint load. A pointed round may suit shorter lines or varied small marks better. Try both shapes for the details you paint most, then choose the one that feels steadier and gives you the result you want.

Article by
Art Parts Fine Arts
Art Parts Fine Arts is an Australian art-supplies store based in Albury, shipping Australia-wide. Hand-picked by artists, our range covers paints, canvas, brushes, paper, printmaking and more, for everyone from students to professionals. We share practical guides and tips to help you get the most out of your materials.
Disclaimer
This article is general information to help you choose and use art materials. It is not professional, health or safety advice. Always follow the manufacturer's instructions and safety guidance for any product, and take care when using solvents, varnishes and other materials. Product availability, specifications and pricing may change, so please check the current product page for details.