

Best Oil Painting Varnish: Australian Buyer's Guide
Waiting six months to find the best varnish for oil painting might be the very thing that puts your finished work at risk in a dusty Australian studio. We've all felt that nervous hesitation when reaching for a bottle, f…Waiting six months to find the best varnish for oil painting might be the very thing that puts your finished work at risk in a dusty Australian studio. We've all felt that nervous hesitation when reaching for a bottle, fearing a cloudy finish or a brush that ruins months of effort. It's a common concern, especially when traditional rules suggest leaving a canvas for a full year before applying that final protective layer.
Selecting the right coating doesn't have to be a gamble with your hard work. This guide will show you how to choose a finish that withstands UV damage and the unique challenges of our local climate without the long wait. We'll help you move past the fear of yellowing or poor application so you can seal your paintings with professional confidence.
You'll learn the practical differences between traditional resins and modern synthetics like those from Langridge. We also cover the specific steps for a flawless finish and which archival options ensure your colours stay vibrant for decades. This guide provides the clarity you need to ensure your art remains as striking as the day you finished it.
Key Takeaways
- Understand why the best varnish for oil painting acts as a crucial sacrificial barrier against environmental pollutants and unifies the surface sheen.
- Discover why modern synthetic resins, like those found in Langridge mediums, offer better archival stability and flexibility than traditional Damar options.
- Learn the correct preparation steps to ensure your painting is ready for coating and how to apply the liquid horizontally for an even finish.
- Find out how high-volume artists achieve professional consistency across a series by using standardised stretched canvas from full cartons.
Why Choosing the Best Varnish for Oil Painting is Essential
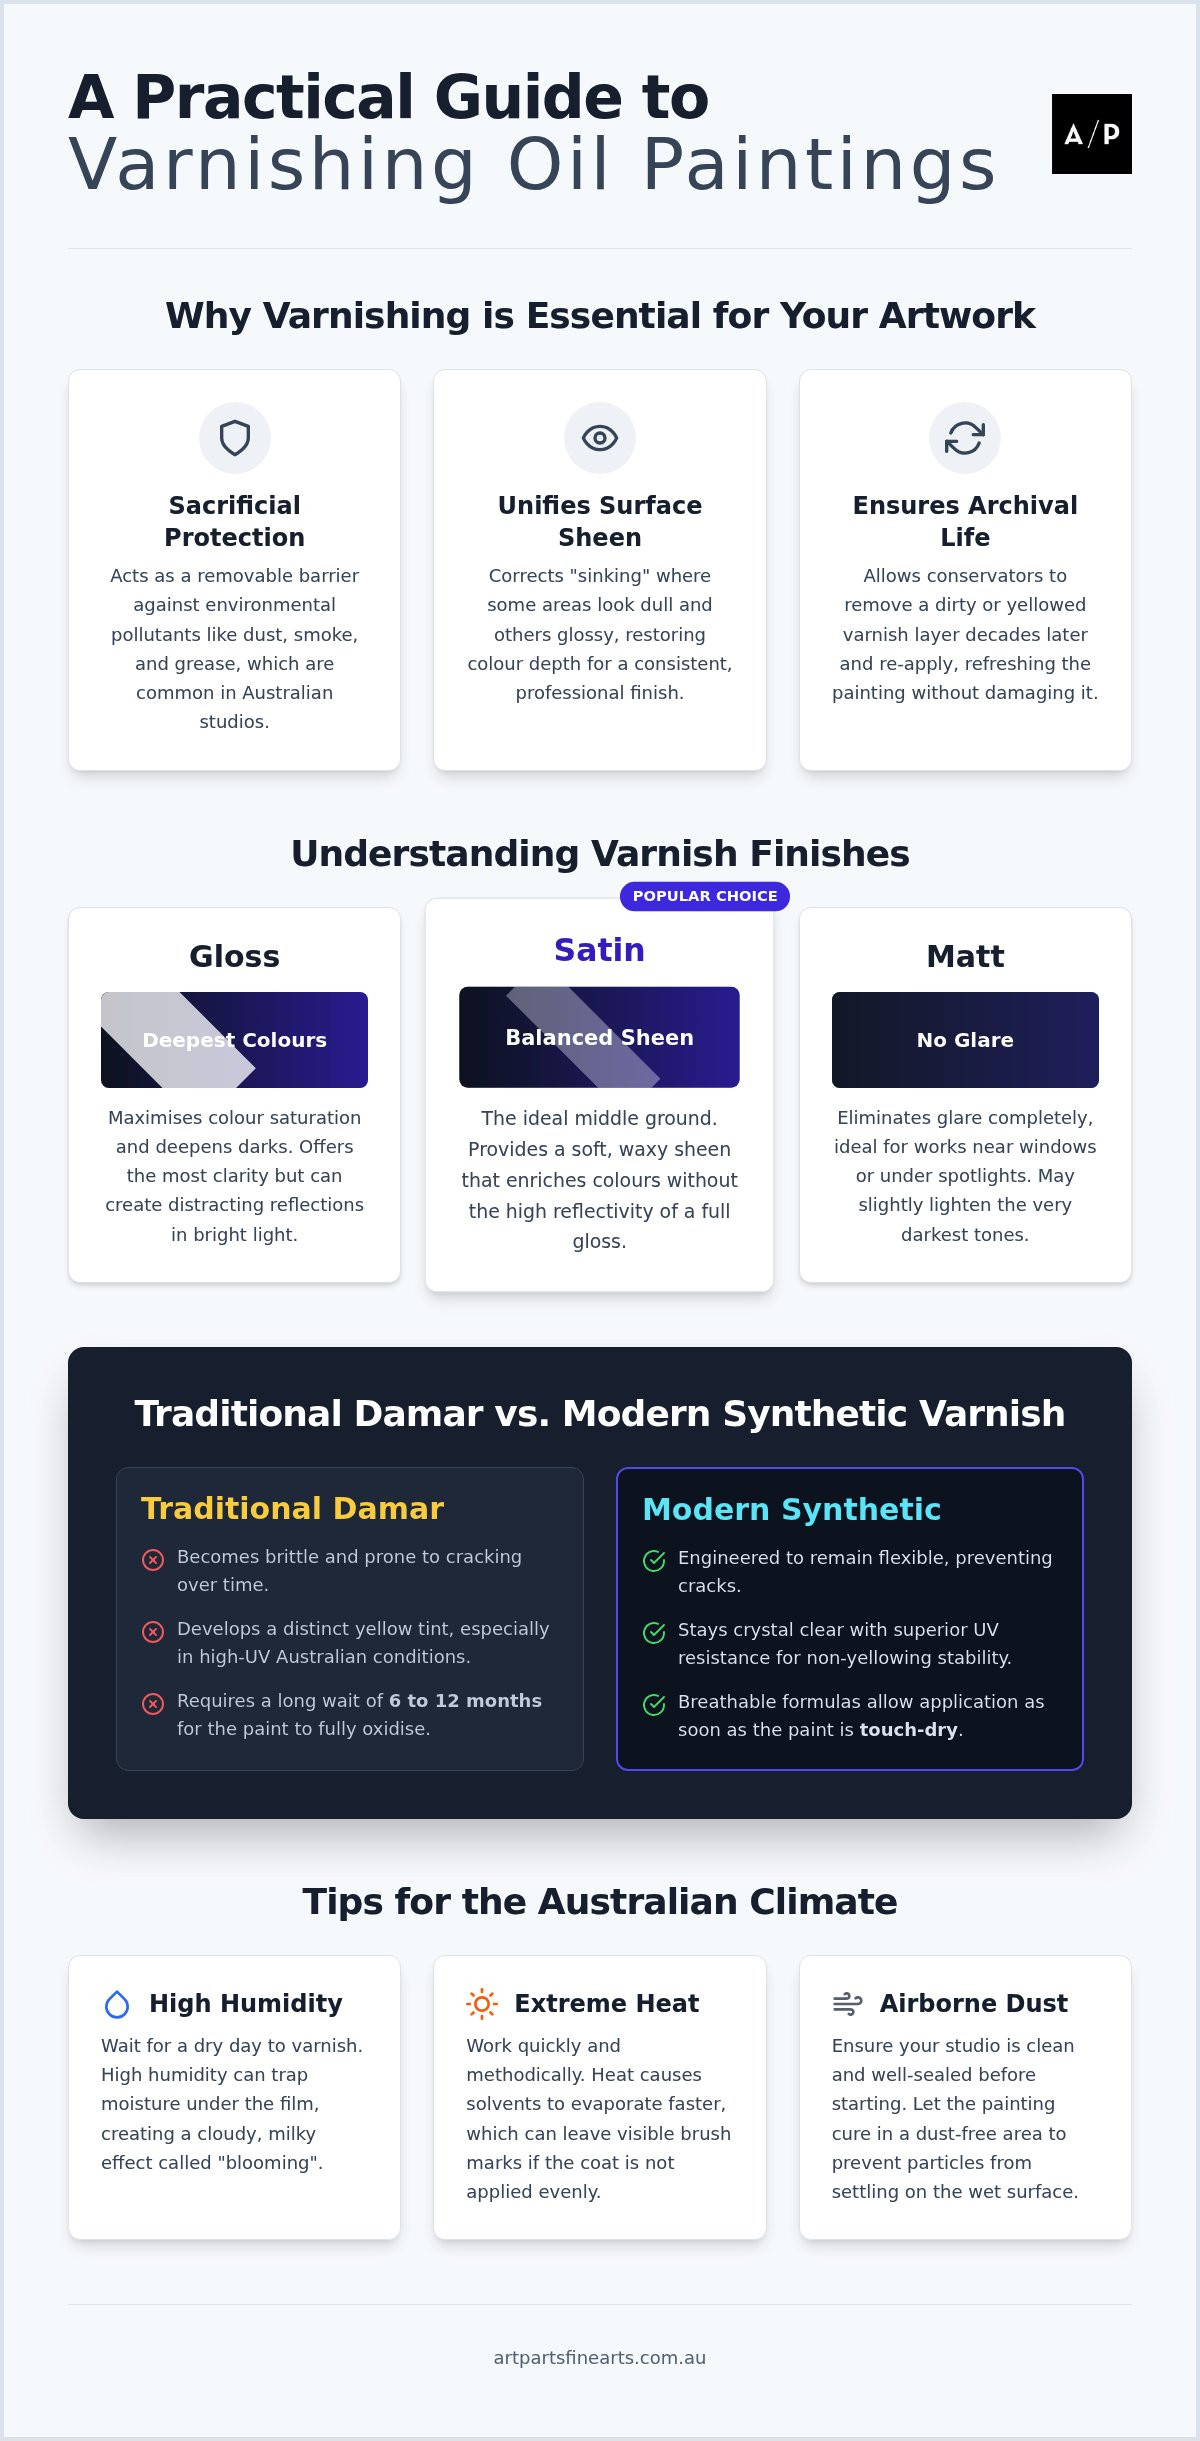
Varnish is far more than a final aesthetic touch. It serves as a vital sacrificial barrier that protects your work from environmental pollutants like dust, smoke, and grease. In many Australian regions, airborne dust and seasonal smoke are constant challenges for a working studio. Without a layer of Varnish, these particles settle directly into the paint film, eventually becoming impossible to clean without risking the integrity of the artwork.
Applying the best varnish for oil painting also solves common visual issues like "sinking." This occurs when the oil from the paint is absorbed into the lower layers of the canvas or mediums, leaving some areas looking dull and others glossy. A final coat unifies the surface sheen, ensuring the entire piece has a consistent finish and restored colour depth.
Archival protection is the third pillar of quality varnishing. Professional-grade products are formulated to be removable decades after application. This allows future owners or conservators to strip away a yellowed or dirty layer and replace it with a fresh coat, effectively hitting a "reset button" on the painting's appearance without touching the original paint.
Understanding Finish Options: Gloss, Satin, and Matt
The finish you choose dictates how light interacts with your colours. Each option provides a different level of reflectivity and saturation:
- Gloss: This is a favourite for traditional realism as it increases colour saturation and deepens dark values. It offers the most clarity but can create distracting reflections in brightly lit rooms.
- Matt: By using matting agents, this finish eliminates glare entirely. It's a practical choice for works displayed near large windows or under direct gallery spotlights, though it can slightly lighten very dark tones.
- Satin: Providing a soft, waxy sheen, satin is the ideal middle ground. It offers enough shine to enrich the colours without the high reflectivity of a full gloss.
Traditional Damar vs. Modern Synthetic Varnishes
For generations, Damar was the standard choice for finishing a work. It's a natural resin that provides a deep gloss, but it has significant drawbacks for the modern artist. Over time, Damar becomes brittle and develops a distinct yellow tint. This yellowing happens even faster in high-UV environments like Australia. Modern synthetic resins, such as those used in Langridge oil paints mediums, offer a more stable alternative. These resins are engineered to stay crystal clear and flexible, which prevents the cracking often seen in older paintings.
The biggest hurdle with traditional products is the wait time. You usually have to wait 6 to 12 months for the oil paint film to fully oxidise before applying a natural resin. If you apply it too early, the varnish can bond permanently with the paint, making future restoration impossible. Research from the Smithsonian Museum Conservation Institute highlights how modern formulations have changed this timeline. Breathable synthetic options allow you to seal your work as soon as it's touch-dry. This is a major practical advantage for artists who need to ship or exhibit their work shortly after finishing it.
Varnishing in the Australian Climate
Our local conditions require specific care to find the best varnish for oil painting. High humidity often leads to "blooming," where moisture gets trapped under the film and creates a cloudy, milky effect. It's best to practise patience and wait for a dry day with low humidity. In extreme heat, solvents evaporate quickly, which can leave visible brush marks. You'll need to work fast and in a methodical pattern to ensure an even coat before the liquid sets.
Dust control is your final challenge during the curing process. Always ensure your studio is clean and sealed before you begin. If you're preparing a large body of work, starting with a full carton of canvas helps you maintain a consistent surface across your series, making the final varnishing step much more predictable.
How to Apply Varnish Like a Professional
Applying the best varnish for oil painting requires a methodical approach to avoid common pitfalls like bubbles or an uneven sheen. It starts with ensuring your painting is completely touch-dry. Even if you're using modern breathable resins, the paint film must be stable enough to withstand the brushwork without lifting. If the paint is still soft underneath, the solvent in the varnish could potentially disturb the delicate layers of your work.
Always work in a flat, horizontal position. This prevents the liquid from running or dripping, allowing it to level out naturally across the surface. It's better to apply two or three thin, even coats rather than one thick layer. Thick applications often lead to pooling, uneven drying, or cloudy patches that are difficult to correct later. Allow each coat to dry fully in a dust-free area before adding the next.
Use a dedicated varnishing brush for the task. A wide, flat taklon or a soft natural hair brush works best. It's vital to keep this brush exclusively for varnishing. Any residue from previous painting sessions, like old oil or pigment, can streak your final finish and ruin the clarity of your work. Clean your brush thoroughly with the appropriate solvent immediately after use to maintain its softness.
Preparation and Studio Setup
Before you open the bottle, wipe the painting surface gently with a dry, lint-free cloth. This removes studio debris and dust that may have settled during the drying weeks. Organise your workspace to minimise air movement. Closing windows and doors while the varnish is tacky prevents floating particles from becoming permanently embedded in the film.
If you have experimented with cold wax medium for oil painting, remember that it behaves differently to liquid resins. Wax provides a soft, matte, tactile finish that is buffed into the surface rather than brushed on as a liquid layer. This technique is excellent for artists seeking a non-reflective, contemporary look.
Selecting Varnish for High-Volume Studio Work
Professional artists often wait until an entire series is complete before beginning the final coating process. This approach ensures a uniform sheen across every piece in a collection, which is vital for a cohesive exhibition. Using the best varnish for oil painting in a single session allows you to maintain consistent environmental conditions and application rhythms for every canvas.
Consistency is much easier to achieve when you work on standardised surfaces. Starting your series with a full carton of canvas ensures that every support has the same gesso priming and "tooth," which is the surface texture that grips the paint. This uniformity means the varnish will absorb and sit on the surface in the same way across all works, preventing unexpected dull patches.
For artists working with heavy texture or impasto, brush application can be difficult and may lead to pooling in deep crevices. In these cases, a high-quality spray varnish is a practical alternative. It provides a light, even mist that reaches into the texture without the risk of bubbles or brush marks that can occur with a heavy-handed application.
Efficiency and Archival Standards
Busy studios can manage costs better by purchasing mediums and varnishes in larger quantities, which reduces the cost per millilitre. It's also a good habit to keep a studio log of which specific resin was used on each piece. This information is invaluable for future conservators who may need to clean or restore the work decades later.
Ensure your canvas supports, such as CreateART or Wright & Co, are triple-primed with acrylic gesso. Proper priming prevents the varnish from "sinking" into the fibres. This often happens if the "sizing," the initial sealant applied to raw canvas to prevent oil absorption, is insufficient. High-quality archival resins ensure your bulk work retains its clarity and value for collectors over time.
Protecting Your Work for Future Generations
Choosing the best varnish for oil painting ensures your creative vision remains vibrant and intact long after the paint dries. By opting for modern synthetic resins like those from Langridge, you avoid the yellowing risks of traditional Damar and the frustration of waiting six months to finish a piece. Remember to work horizontally in a dust-free space to achieve that professional, unified sheen that collectors value.
Our team consists of practising Australian artists who understand the practicalities of a working studio. We provide expert advice alongside professional-grade Langridge mediums and archival quality stretched canvases to support your creative journey. Whether you're a beginner or a professional, using the right tools makes every stage of the process more rewarding and reliable.
While we focus on the studio, the principles of professional application and surface protection remain universal; for those curious about how these standards translate to residential projects, check out Chaparro's Painting, LLC for a look at expert interior and exterior painting services.
We look forward to seeing your finished series protected and ready for display. Reach out to our friendly team at Art Parts Fine Arts if you need help selecting the right finish or application tools for your specific style.
Frequently Asked Questions
How long do I really need to wait before varnishing an oil painting?
You should wait between six and twelve months for traditional natural resins to ensure the oil film has fully oxidised. However, modern breathable synthetics allow for much earlier application once the paint is firm and touch-dry. This flexibility makes them a strong contender for the best varnish for oil painting when you need to meet exhibition deadlines without risking the archival integrity of your work.
Can I use acrylic varnish on an oil painting?
No, you shouldn't use water-based acrylic varnish on an oil painting because it won't adhere properly to the oily surface. The varnish will likely bead up during application or peel off as it dries. Always choose a resin-based product specifically formulated for oils. These solvents are designed to bond with the paint film, providing the durable and removable protection that professional artists require for their finished canvases.
What is the best way to remove old, yellowed varnish?
Removing aged varnish requires a gentle touch and the correct solvent, usually distilled turpentine or odourless mineral spirits. Dampen a clean cotton swab and work in small, circular motions on a non-critical area to test the reaction first. This process slowly dissolves the sacrificial layer without disturbing the underlying paint. It's a delicate task often best left to professional conservators if the painting is of significant historical or monetary value.
Is spray varnish better than brush-on varnish for oils?
Neither method is inherently better; the choice depends on your painting's texture. Spray varnish is ideal for high-texture impasto works where a brush might cause pooling in deep crevices or disturb delicate glazes. Conversely, brush-on application offers more control and a thicker protective layer for smooth, traditional works. Many artists find that a brush provides the best varnish for oil painting when they want to achieve a deep, glass-like gloss finish.
What should I do if my varnish looks cloudy after it dries?
Cloudiness, often called blooming, usually happens when moisture is trapped under the varnish layer during application in high humidity. You can sometimes fix this by gently warming the surface with a hairdryer or applying a very thin refresher coat of solvent. To prevent this, always avoid varnishing on rainy or humid days. Ensuring your studio environment is dry and stable is the most effective way to maintain a crystal-clear archival finish.

Article by
Art Parts Fine Arts
Art Parts Fine Arts is an Australian art-supplies store based in Albury, shipping Australia-wide. Hand-picked by artists, our range covers paints, canvas, brushes, paper, printmaking and more, for everyone from students to professionals. We share practical guides and tips to help you get the most out of your materials.
Disclaimer
This article is general information to help you choose and use art materials. It is not professional, health or safety advice. Always follow the manufacturer's instructions and safety guidance for any product, and take care when using solvents, varnishes and other materials. Product availability, specifications and pricing may change, so please check the current product page for details.